Difference between revisions of "List of lonelygirl15 videos/Season 2"
From LGPedia
m (Redirect...for about 250 vids) |
m |
||
| (6 intermediate revisions by 3 users not shown) | |||
| Line 1: | Line 1: | ||
| − | # | + | {|width="100%" cellspacing="0" cellpadding="0" style="border-spacing: 0px; table-layout: fixed;" |
| + | |style="width: 20px; border-left: 15px solid #ffffff;"| | ||
| + | | | ||
| + | |style="width: 20px;"| | ||
| + | |style="width: 190px;"| | ||
| + | |style="width: 190px;"| | ||
| + | |- | ||
| + | |colspan="5" style="background-color: #1a4b97;"|[[Image:List of videos.jpg|link=]] <!-- #134b9c is the real color --> | ||
| + | |- | ||
| + | |align="left" valign="top" style="width: 20px; border-left: 15px solid #1a4b97; padding: 0px;"|[[Image:Lgp lov tl corner.png|link=]] | ||
| + | | | ||
| + | |align="right" valign="top" style="width: 20px; padding: 0px;"|[[Image:Lgp lov tr corner.png|link=]] | ||
| + | |colspan="2" style="background-color: #1a4b97; width: 380px;"| | ||
| + | |- | ||
| + | |colspan="3" valign="top" style="border-left: 15px solid #1a4b97; padding: 0px;font-family:Arial,Sans-serif; font-size:13px; line-height:18px"| | ||
| + | <!-- ################################################################### | ||
| + | ########################### LIST STARTS HERE ########################### | ||
| + | #################################################################### --> | ||
| + | <div style="font-family:Arial,Sans-serif;font-size:13px; line-height:20px"> | ||
| + | {{LoVNavi|2}} | ||
| + | <ol start="257" style="line-height: 150%;"> | ||
| + | ===1. Mourning Bree=== | ||
| + | <li>[[Speak to Me!]] {{Init|Carla}} | ||
| + | <li>[[Sluttiness Prevails]] {{Init|Taylor}} | ||
| + | <li>[[The Unsolvable Formula]] {{Init|Spencer}} | ||
| + | <li>[[We Reach Out]] {{init|Claire}} | ||
| + | <li>[[My Parents Suck Too]] {{init|Daniel}} | ||
| + | <li>[[Nothing More, Nothing Less]] {{init|Hymn of One}} | ||
| + | <li>[[I'm Done]] {{init|Jonas}} | ||
| + | <li>[[Back to Work]] {{init|Spencer}} | ||
| + | |||
| + | ===2. Meeting Jonas's Family=== | ||
| + | <li>[[Remember Them?]] {{init|Claire}} | ||
| + | <li>[[Hey Dad]] {{init|Jonas}} | ||
| + | <li>[[The Email]] {{init|Daniel}} | ||
| + | <li>[[Sexy Librarian ;)]] {{init|Sarah}} | ||
| + | <li>[[Way of the Gun]] {{init|Claire}} | ||
| + | <li>[[A Family Affair]] {{init|Jonas}} | ||
| + | <li>[[Who's Next?]] {{init|Claire}} | ||
| + | <li>[[Drunken Yodeling]] {{init|Daniel}} | ||
| + | <li>[[Eternal Freaks]] {{init|Jonas}} | ||
| + | <li>[[Hot Date]] {{init|Daniel}} | ||
| + | <li>[[Run!]] {{Init|Taylor}} | ||
| + | <li>[[Home Invasion]] {{Init|Jonas}} | ||
| + | |||
| + | ===3. Protecting Emma=== | ||
| + | <li>[[Grand Canyon]] {{Init|Jonas}} | ||
| + | <li>[[Dirty Secrets]] {{Init|Daniel}} | ||
| + | <li>[[Gross Guy]] {{Init|Taylor}} | ||
| + | <li>[[Stupid B!tch!]] {{Init|Jonas}} | ||
| + | <li>[[Sister to Sister]] {{Init|Taylor}} | ||
| + | <li>[[Revealing My Secret]] {{init|Sarah}} | ||
| + | <li>[[Shadow of Death]] {{Init|Daniel}} | ||
| + | <li>[[What Happened???]] {{Init|Jonas}} | ||
| + | <li>[[A New Hope!!!]] {{Init|Jonas}} | ||
| + | <li>[[Go For It :)]] {{Init|Emma}} | ||
| + | <li>[[Help Us!]] {{init|Claire}} | ||
| + | <li>[[Bullsh%t]] {{init|Daniel}} | ||
| + | <li>[[Decision Time]] {{init|Daniel}} | ||
| + | <li>[[Last Train To...]] {{init|Daniel}} | ||
| + | <li>[[Spreading the Song]] {{init|Jonas}} | ||
| + | <li>[[Living with Girls]] {{init|Daniel}} | ||
| + | <li>[[Stakeout... With A Girl]] {{Init|Jonas}} | ||
| + | <li>[[I Like Being Me]] {{Init|Emma}} | ||
| + | <li>[[Robbing the Cradle]] {{init|Daniel}} | ||
| + | |||
| + | ===4. Giving Emma to LaRezisto=== | ||
| + | <li>[[Join Me!]] {{init|Claire}} | ||
| + | <li>[[How Could You? (season 2)|How Could You?]] {{init|Daniel}} | ||
| + | <li>[[Student Film]] {{init|Daniel}} | ||
| + | <li>[[Finding Help]] {{init|Jonas}} | ||
| + | <li>[[No More Lies]] {{init|Sarah}} | ||
| + | <li>[[Secrets Revealed]] {{init|Mallory}} | ||
| + | <li>[[Watch Your Back]] {{Init|Jonas}} | ||
| + | <li>[[My School Project]] {{init|Daniel}} | ||
| + | <li>[[My Fatal Mistake]] {{init|Jonas}} | ||
| + | <li>[[He's Not Talking]] {{init|Daniel}} | ||
| + | <li>[[That Arrogant Jerk!]] {{init|Sarah}} | ||
| + | <li>[[Please Help]] {{init|Mallory}} | ||
| + | <li>[[Home Sweet Home?]] {{init|Jonas}} | ||
| + | <li>[[Carving Pumpkins]] {{init|Sarah}} | ||
| + | <li>[[Tailgating]] {{init|Daniel}} | ||
| + | <br>[[When Nikki Attacks...]] {{init|Nikki Bower}} | ||
| + | <li>[[Ninja Video by ElizKM86]] {{init|Mallory}} | ||
| + | |||
| + | ===5. Stealing the Ceremony Baby=== | ||
| + | <li>[[We All Make Mistakes]] {{init|Sonia}} | ||
| + | <li>[[Batting Practice]] {{init|Jonas}} | ||
| + | <li>[[Emma's Safe]] {{init|Claire}} | ||
| + | <li>[[Pi]] {{init|Daniel}} | ||
| + | <li>[[Behind The Bushes]] {{init|Daniel}} | ||
| + | <li>[[Girl Talk]] {{init|Claire}} | ||
| + | <li>[[Eavesdropping]] {{init|Daniel}} | ||
| + | <li>[[She's Telling The Truth]] {{init|Claire}} | ||
| + | <li>[[They'll Do Anything]] {{init|Daniel}} | ||
| + | |||
| + | ===6. Battle of the Sexes=== | ||
| + | <li>[[Battle of the Sexes]] {{init|Sarah}} | ||
| + | <li>[[Nice Try]] {{init|Jonas}} | ||
| + | <li>[[They Beat Her!!!]] {{init|Sarah}} | ||
| + | <br>[[Claire's Hideout - NBR Investigates]] {{init|Nikki Bower}} | ||
| + | <li>[[They Belong With Us]] {{init|Hymn of One}} | ||
| + | <li>[[A Woman's Touch]] {{init|Sarah}} | ||
| + | <li>[[Slow Down and Stare]] {{init|Jonas}} | ||
| + | <li>[[What's Going on?]] {{init|Daniel}} | ||
| + | |||
| + | ===7. Getting Emma Back=== | ||
| + | <li>[[Storytelling]] {{init|Claire}} | ||
| + | <li>[[Goodbye For Now]] {{init|Claire}} | ||
| + | <li>[[Lonelygirl15 Season Two... So Far]] {{init|The Creators}} | ||
| + | <li>[[Is This The End?]] {{init|Jonas}} | ||
| + | <li>[[What Happened?]] {{init|Emma}} | ||
| + | <li>[[Cat Hunt]] {{init|Jonas}} | ||
| + | <li>[[Around the World]] {{init|Emma}} | ||
| + | <li>[[School's Out]] {{init|Daniel}} | ||
| + | <li>[[School's In]] {{init|Daniel}} | ||
| + | <li>[[Sarah and the City]] {{init|Sarah}} | ||
| + | |||
| + | ===8. The Lullaby Project=== | ||
| + | <li>[[Connections]] {{init|Jonas}} | ||
| + | <li>[[The Ladies Room]] {{init|Sarah}} | ||
| + | <li>[[Sick Dreams]] {{init|Emma}} | ||
| + | <li>[[Gay or Not?]] {{init|Daniel}} | ||
| + | <li>[[The Beast's Turn - "MMYB"]] {{init|Daniel}} | ||
| + | <li>[[Abducted?!]] {{init|Daniel}} | ||
| + | <li>[[Lonelygirl15 Week 14 Recap]] {{init|The Creators}} | ||
| + | <li>[[They're Gone]] {{init|Daniel}} | ||
| + | <li>[[Groping in the Dark]] {{init|Jonas}} | ||
| + | <li>[[Rescued?!]] {{init|Jonas}} | ||
| + | <li>[[intense / in tents]] {{init|Sarah}} | ||
| + | <li>[[Missing Friends]] {{init|Daniel}} | ||
| + | <li>[[DANGEROUS DESERT]] {{init|Jonas}} | ||
| + | <br>[[Groping (Alone) in the Dark]] {{init|Nikki Bower}} | ||
| + | <br>[[Me...Jack]] {{init|Jack}} | ||
| + | |||
| + | ===9. Patient #11 and Dr. Hart=== | ||
| + | <li>[[Would you pick me up?]] {{init|Jonas}} | ||
| + | <li>[[Who's that girl?]] {{init|Jonas}} | ||
| + | <br>[[A Day in the Life of Jack]] {{init|Jack}} | ||
| + | <li>[[Drunk By Bedtime]] {{init|Daniel}} | ||
| + | <li>[[Doctor Visit]] {{init|Jonas}} | ||
| + | <li>[[Eat Pie]] {{init|Emma}} | ||
| + | <li>[[Shocking Discovery]] {{init|Taylor}} | ||
| + | <li>[[OMG! You have to save her!]] {{init|Taylor}} | ||
| + | <li>[[Ambushed in a Tent]] {{init|Jonas}} | ||
| + | <br>[[Soooo Weird]] {{init|Jack}} | ||
| + | <li>[[Can't Sleep. Wanna chat?]] {{init|Emma}} | ||
| + | |||
| + | ===10. Mallory's Affair=== | ||
| + | <li>[[xxKissKissxx]] {{init|Mallory}} | ||
| + | <li>[[Jonas Cares]] {{init|Daniel}} | ||
| + | <li>[[Evil Drug Company Exposed!]] {{init|Jonas}} | ||
| + | <li>[[Missing Girl Found]] {{init|Sarah}} | ||
| + | <li>[[Killers at the Door?!]] {{init|Jonas}} | ||
| + | <li>[[Playing Doctor]] {{init|Jonas}} | ||
| + | <br>[[It Didn't Happen (Did It?)]] {{init|Jack}} | ||
| + | <li>[[Jennie Bares All]] {{init|Sarah}} | ||
| + | <li>[[Conjugal Visit]] {{init|Daniel}} | ||
| + | <li>[[Hot for Teacher]] {{init|Daniel}} | ||
| + | <li>[[Germ Warfare Attack]] {{init|Daniel}} | ||
| + | <li>[[Get Your Freak On]] {{init|Emma}} | ||
| + | <li>[[I'll Do Whatever It Takes]] {{init|Mallory}} | ||
| + | <li>[[Rebound Action]] {{init|Daniel}} | ||
| + | <li>[[Emma's Choice]] {{init|Jonas}} | ||
| + | <br>[[I Need Help]] {{init|Jack}} | ||
| + | |||
| + | ===11. Living With The Lullaby=== | ||
| + | <li>[[Free Love]] {{init|Sarah}} | ||
| + | <li>[[Corporate Thugs Are Stalking Us]] {{init|Jonas}} | ||
| + | <li>[[Procreating on Peyote]] {{init|Jennie}} | ||
| + | <li>[[Tired of B*tches]] {{init|Daniel}} | ||
| + | <li>[[Am I A Murderer?]] {{init|Jennie}} | ||
| + | <br>[[How It Feels]] {{init|Jack}} | ||
| + | <li>[[Spies In Our Midst]] {{init|Jonas}} | ||
| + | <li>[[A Girl Alone]] {{init|Emma}} | ||
| + | <li>[[They Shot Him!]] {{init|Jonas}} | ||
| + | <li>[[Killed By Big Pharma]] {{init|Jonas}} | ||
| + | <li>[[Share My Sleeping Bag]] {{init|Sarah}} | ||
| + | <li>[[Help Me Save Them!]] {{init|Jennie}} | ||
| + | <li>[[Party of One]] {{init|Jennie}} | ||
| + | <li>[[Brainwashed In Chat]] {{init|Emma}} | ||
| + | <li>[[Being Stalked]] {{init|Mallory}} | ||
| + | <li>[[Party Crashers]] {{init|Daniel}} | ||
| + | <br>[[The Stalker is Right Outside!]] {{init|Jack}} | ||
| + | |||
| + | ===12. On the Offensive=== | ||
| + | <li>[[Splitting Up]] {{init|Jonas}} | ||
| + | <li>[[Bus-ted]] {{init|Daniel}} | ||
| + | <li>[[Can't Sleep... with Me]] {{init|Sarah}} | ||
| + | <li>[[Cream or Sugar?]] {{init|Jonas}} | ||
| + | <li>[[The Kiss-Off]] {{init|Daniel}} | ||
| + | <li>[[Looking For A Date]] {{init|Sarah}} | ||
| + | |||
| + | ===13. Gone...Again=== | ||
| + | <li>[[KIDNAPPED!]] {{init|Jennie}} | ||
| + | <li>[[Watch Me Balance]] {{init|Taylor}} | ||
| + | <br>[[Learn how to TELEPORT!]] {{init|Jack}} | ||
| + | <li>[[Long Drive Home]] {{init|Jennie}} | ||
| + | <li>[[Stay Strong]] {{init|Daniel}} | ||
| + | <li>[[Dangerous Territory!!!]] {{init|Taylor}} | ||
| + | <li>[[Girl Tied Up]] {{init|Dr. Hart}} | ||
| + | |||
| + | ===14. Explanation Time=== | ||
| + | <li>[[Beer Bath]] {{init|Jonas}} | ||
| + | <br>[[You Were Right]] {{init|Jack}} | ||
| + | <li>[[Am I A Criminal?]] {{init|Sarah}} | ||
| + | <li>[[Lost & Found]] {{init|Daniel}} | ||
| + | <li>[[Attracted to Danger]] {{init|Jennie}} | ||
| + | <li>[[Her Body, Her Blood]] {{init|Dr. Hart}} | ||
| + | <li>[[Too Dangerous!]] {{init|Jonas}} | ||
| + | |||
| + | ===15. Bloodlines=== | ||
| + | <li>[[Bloodlines: Part 1]] {{init|Jonas}} | ||
| + | <li>[[Bloodlines: Part 2]] {{init|Jonas}} | ||
| + | <li>[[Bloodlines: Part 3]] {{init|Jonas}} | ||
| + | <li>[[Bloodlines: Part 4]] {{init|Dr. Hart}} | ||
| + | |||
| + | ===16. After The Finale=== | ||
| + | [[In Over Our Heads]] {{init|Taylor}} | ||
| + | <br>[[Nikki Tied Up]] {{init|Nikki Bower}} | ||
| + | <br>[[Is That Blood??]] {{init|Taylor}} | ||
| + | <br>[[I'm Soooo Gullible!!!]] {{init|Taylor}} | ||
| + | |||
| + | </ol> | ||
| + | {{LoVNavi|2}} | ||
| + | </div> | ||
| + | <!-- ################################################################### | ||
| + | ############################ LIST ENDS HERE ############################ | ||
| + | #################################################################### --> | ||
| + | |style="background-color: #1a4b97; width: 190px;" align="center" valign="top"| | ||
| + | <div style="width: 95%; border: 1px solid #FFFFFF; margin-left: auto; margin-right: auto;"> | ||
| + | <div style="background-color: #1a4b97; color: #FFFFFF; font-weight: bold;font-family:Arial,Sans-serif; font-size:13px; line-height:18px">Table of Contents</div> | ||
| + | <div style="padding: 3px; vertical-align: middle; background-color: #FFFFFF; border: 3px solid #1a4b97; text-align: left;font-family:Arial,Sans-serif; font-size:12px; line-height:15px"> | ||
| + | <!-- ################################################################### | ||
| + | ############################ TOC STARTS HERE ########################### | ||
| + | #################################################################### --> | ||
| + | *[[#1. Mourning Bree|Mourning Bree]] | ||
| + | *[[#2. Meeting Jonas's Family|Meeting Jonas's Family]] | ||
| + | *[[#3. Protecting Emma|Protecting Emma]] | ||
| + | *[[#4. Giving Emma to LaRezisto|Giving Emma to LaRezisto]] | ||
| + | *[[#5. Stealing the Ceremony Baby|Stealing the Ceremony Baby]] | ||
| + | *[[#6. Battle of the Sexes|Battle of the Sexes]] | ||
| + | *[[#7. Getting Emma Back|Getting Emma Back]] | ||
| + | *[[#8. The Lullaby Project|The Lullaby Project]] | ||
| + | *[[#9. Patient #11 and Dr. Hart|Patient #11 and Dr. Hart]] | ||
| + | *[[#10. Mallory's Affair|Mallory's Affair]] | ||
| + | *[[#11. Living With The Lullaby|Living With The Lullaby]] | ||
| + | *[[#12. On the Offensive|On the Offensive]] | ||
| + | *[[#13. Gone...Again|Gone...Again]] | ||
| + | *[[#14. Explanation Time|Explanation Time]] | ||
| + | *[[#15. Bloodlines|Bloodlines]] | ||
| + | *[[#16. After The Finale|After The Finale]] | ||
| + | |||
| + | <!-- ################################################################### | ||
| + | ############################# TOC ENDS HERE ############################ | ||
| + | #################################################################### --> | ||
| + | </div> | ||
| + | </div><br Clear> | ||
| + | <!-- ################################################################### | ||
| + | ################### LEFT SCREENCAP COLUMN STARTS HERE ################## | ||
| + | #################################################################### --> | ||
| + | {|style="background-color: #1a4b97;" | ||
| + | |[[Image:0257-JonasOnCouch.JPG|180px|link=Speak to Me!]] | ||
| + | |- | ||
| + | |height="12px"|<!-- spacer --> | ||
| + | |- | ||
| + | |[[Image:0262-CarlAndSonia.JPG|180px|link=Nothing More, Nothing Less]] | ||
| + | |- | ||
| + | |height="12px"|<!-- spacer --> | ||
| + | |- | ||
| + | |[[Image:0265-JonasParents.jpg|180px|link=Remember Them?]] | ||
| + | |- | ||
| + | |height="12px"|<!-- spacer --> | ||
| + | |- | ||
| + | |[[Image:0268-SarahAtTheBookstoreLookingDown-Cropped.jpg|180px|link=Sexy Librarian ;)]] | ||
| + | |- | ||
| + | |height="12px"|<!-- spacer --> | ||
| + | |- | ||
| + | |[[Image:0272 DanielAndMelody.jpg|180px|link=Drunken Yodeling]] | ||
| + | |- | ||
| + | |height="12px"|<!-- spacer --> | ||
| + | |- | ||
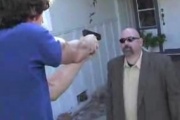
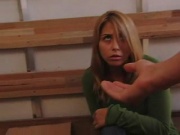
| + | |[[Image:0276-JonasAtGunpointOnTheFloor.jpg|180px|link=Home Invasion]] | ||
| + | |- | ||
| + | |height="12px"|<!-- spacer --> | ||
| + | |- | ||
| + | |[[Image:0284-EmmaWalksTowardShadow.jpg|180px|link=Shadow of Death]] | ||
| + | |- | ||
| + | |height="12px"|<!-- spacer --> | ||
| + | |- | ||
| + | |[[Image:0299 ClairPonytail.jpg|180px|link=Finding Help]] | ||
| + | |- | ||
| + | |height="12px"|<!-- spacer --> | ||
| + | |- | ||
| + | |[[Image:LG373Emma.jpg|180px|link=Watch Your Back]] | ||
| + | |- | ||
| + | |height="12px"|<!-- spacer --> | ||
| + | |- | ||
| + | |[[Image:309-SarahAndMalloryCarvingPumpkins.jpg|180px|link=Carving Pumpkins]] | ||
| + | |- | ||
| + | |height="12px"|<!-- spacer --> | ||
| + | |- | ||
| + | |[[Image:LGpiJonas.JPG|180px|link=Pi]] | ||
| + | |- | ||
| + | |height="12px"|<!-- spacer --> | ||
| + | |- | ||
| + | |[[Image:LG323JonasDeacon.jpg|180px|link=They'll Do Anything]] | ||
| + | |- | ||
| + | |height="12px"|<!-- spacer --> | ||
| + | |- | ||
| + | |[[Image:0325_MalloryKissChris.jpg|180px|link=A Woman's Touch]] | ||
| + | |- | ||
| + | |height="12px"|<!-- spacer --> | ||
| + | |- | ||
| + | |[[Image:333-Jonas.jpg|180px|link=Cat Hunt]] | ||
| + | |- | ||
| + | |height="12px"|<!-- spacer --> | ||
| + | |- | ||
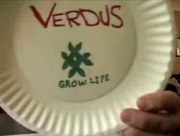
| + | |[[Image:0338_VerdusPharmaceuticals.jpg|180px|link=Connections]] | ||
| + | |- | ||
| + | |height="12px"|<!-- spacer --> | ||
| + | |- | ||
| + | |[[Image:NBR25-Nikki-Truck-Flute.jpg|180px|link=Groping (Alone) in the Dark]] | ||
| + | |- | ||
| + | |height="12px"|<!-- spacer --> | ||
| + | |- | ||
| + | |[[Image:352-Who is that girl.jpg|180px|link=Who's that girl?]] | ||
| + | |- | ||
| + | |height="12px"|<!-- spacer --> | ||
| + | |- | ||
| + | |[[Image:0360-CreepyDelMundo.jpg|180px|link=XxKissKissxx]] | ||
| + | |- | ||
| + | |height="12px"|<!-- spacer --> | ||
| + | |- | ||
| + | |[[Image:0366jennieandsarah.JPG|180px|link=Jennie Bares All]] | ||
| + | |- | ||
| + | |height="12px"|<!-- spacer --> | ||
| + | |- | ||
| + | |[[Image:0369-Daniel-Holding-Apple-Juice-Vial.jpg|180px|link=Germ Warfare Attack]] | ||
| + | |- | ||
| + | |height="12px"|<!-- spacer --> | ||
| + | |- | ||
| + | |[[Image:0371-Malloryheadache.jpg|180px|link=I'll Do Whatever It Takes]] | ||
| + | |- | ||
| + | |height="12px"|<!-- spacer --> | ||
| + | |- | ||
| + | |[[Image:0385-JennieGottheHellAway.JPG|180px|link=Party of One]] | ||
| + | |- | ||
| + | |height="12px"|<!-- spacer --> | ||
| + | |- | ||
| + | |[[Image:0387-MalloryBeingStalked.JPG|180px|link=Being Stalked]] | ||
| + | |- | ||
| + | |height="12px"|<!-- spacer --> | ||
| + | |- | ||
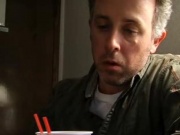
| + | |[[Image:0392-LucyandCarl.jpg|180px|link=Cream or Sugar?]] | ||
| + | |- | ||
| + | |height="12px"|<!-- spacer --> | ||
| + | |- | ||
| + | |[[Image:0396-TaylorUpdatingUs.JPG|180px|link=Watch Me Balance]] | ||
| + | |- | ||
| + | |height="12px"|<!-- spacer --> | ||
| + | |- | ||
| + | |[[Image:0401-JonasBeerBath.jpg|180px|link=Beer Bath]] | ||
| + | |- | ||
| + | |height="12px"|<!-- spacer --> | ||
| + | |- | ||
| + | |[[Image:Herblood.jpg|180px|link=Her Body, Her Blood]] | ||
| + | |} | ||
| + | <!-- ################################################################### | ||
| + | #################### LEFT SCREENCAP COLUMN ENDS HERE ################### | ||
| + | #################################################################### --> | ||
| + | |style="background-color: #1a4b97; width: 190px;" align="center" valign="top"| | ||
| + | <!-- ################################################################### | ||
| + | ################### RIGHT SCREENCAP COLUMN STARTS HERE ################# | ||
| + | #################################################################### --> | ||
| + | {|style="background-color: #1a4b97;" | ||
| + | |[[Image:0258-SarahDressedToGoOut.jpg|180px|link=Sluttiness Prevails]] | ||
| + | |- | ||
| + | |height="15px"|<!-- spacer --> | ||
| + | |- | ||
| + | |[[Image:0260-ShadowOverR!Logo.jpg|180px|link=We Reach Out]] | ||
| + | |- | ||
| + | |height="15px"|<!-- spacer --> | ||
| + | |- | ||
| + | |[[Image:0263-JonasInMourning.jpg|180px|link=I'm Done]] | ||
| + | |- | ||
| + | |height="15px"|<!-- spacer --> | ||
| + | |- | ||
| + | |[[Image:0270-EmmaSmilingOnBed.jpg|180px|link=A Family Affair]] | ||
| + | |- | ||
| + | |height="15px"|<!-- spacer --> | ||
| + | |- | ||
| + | |[[Image:0279-TaylorOnTheLoo.JPG|180px|link=Gross Guy]] | ||
| + | |- | ||
| + | |height="15px"|<!-- spacer --> | ||
| + | |- | ||
| + | |[[Image:0274-MalloryPleasedAfterDanielKissedHer.jpg|180px|link=Hot Date]] | ||
| + | |- | ||
| + | |height="15px"|<!-- spacer --> | ||
| + | |- | ||
| + | |[[Image:0278-JonasAndEmmaOutside.jpg|180px|link=Dirty Secrets]] | ||
| + | |- | ||
| + | |height="15px"|<!-- spacer --> | ||
| + | |- | ||
| + | |[[Image:0287-TheyDied.JPG|180px|link=Help Us!]] | ||
| + | |- | ||
| + | |height="15px"|<!-- spacer --> | ||
| + | |- | ||
| + | |[[Image:301 MalloryandSarahTalking.jpg|180px|link=Secrets Revealed]] | ||
| + | |- | ||
| + | |height="15px"|<!-- spacer --> | ||
| + | |- | ||
| + | |[[Image:0303-SarahLookingStraightAtDaniel.jpg|180px|link=My School Project]] | ||
| + | |- | ||
| + | |height="15px"|<!-- spacer --> | ||
| + | |- | ||
| + | |[[Image:0381-SoniaTailgate.jpg|180px|link=Tailgating]] | ||
| + | |- | ||
| + | |height="15px"|<!-- spacer --> | ||
| + | |- | ||
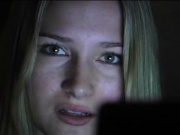
| + | |[[Image:LG314Emma.jpg|180px|link=Emma's Safe]] | ||
| + | |- | ||
| + | |height="12px"|<!-- spacer --> | ||
| + | |- | ||
| + | |[[Image:LG326-SoniasFace.jpg|180px|link=They Beat Her!!!]] | ||
| + | |- | ||
| + | |height="12px"|<!-- spacer --> | ||
| + | |- | ||
| + | |[[Image:Episode 0328-2x072-Goodbye For Now; Emma crying.JPG|180px|link=Goodbye For Now]] | ||
| + | |- | ||
| + | |height="12px"|<!-- spacer --> | ||
| + | |- | ||
| + | |[[Image:ElderFromLG0332.jpg|180px|link=What Happened?]] | ||
| + | |- | ||
| + | |height="12px"|<!-- spacer --> | ||
| + | |- | ||
| + | |[[Image:0336-DanielandMalloryontheBed.jpg|180px|link=School's In]] | ||
| + | |- | ||
| + | |height="12px"|<!-- spacer --> | ||
| + | |- | ||
| + | |[[Image:0347-Sarah-being-rescued.jpg|180px|link=Rescued?!]] | ||
| + | |- | ||
| + | |height="12px"|<!-- spacer --> | ||
| + | |- | ||
| + | |[[Image:357-TaylorWorried.JPG|180px|link=OMG! You have to save her!]] | ||
| + | |- | ||
| + | |height="12px"|<!-- spacer --> | ||
| + | |- | ||
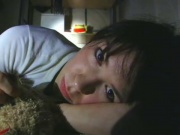
| + | |[[Image:EmmaSleepy.JPG|180px|link=Can't Sleep. Wanna chat?]] | ||
| + | |- | ||
| + | |height="12px"|<!-- spacer --> | ||
| + | |- | ||
| + | |[[Image:0362drhartwithcup.JPG|180px|link=Evil Drug Company Exposed!]] | ||
| + | |- | ||
| + | |height="12px"|<!-- spacer --> | ||
| + | |- | ||
| + | |[[Image:0368-MalloryAndDelMundoKiss.jpg|180px|link=Hot for Teacher]] | ||
| + | |- | ||
| + | |height="12px"|<!-- spacer --> | ||
| + | |- | ||
| + | |[[Image:0374 SarahTurnsHoO.jpg|180px|link=Free Love]] | ||
| + | |- | ||
| + | |height="12px"|<!-- spacer --> | ||
| + | |- | ||
| + | |[[Image:0380-EmmaTouchingWhiteWall.jpg|180px|link=A Girl Alone]] | ||
| + | |- | ||
| + | |height="12px"|<!-- spacer --> | ||
| + | |- | ||
| + | |[[Image:0388-SarahJennieEmma.JPG|180px|link=Party Crashers]] | ||
| + | |- | ||
| + | |height="12px"|<!-- spacer --> | ||
| + | |- | ||
| + | |[[Image:0391-SleepySarah.jpg|180px|link=Can't Sleep... with Me]] | ||
| + | |- | ||
| + | |height="12px"|<!-- spacer --> | ||
| + | |- | ||
| + | |[[Image:0395-DrHartLookingScraggly.jpg|180px|link=KIDNAPPED!]] | ||
| + | |- | ||
| + | |height="12px"|<!-- spacer --> | ||
| + | |- | ||
| + | |[[Image:400-EmmaScreams.jpg|180px|link=Girl Tied Up]] | ||
| + | |- | ||
| + | |height="12px"|<!-- spacer --> | ||
| + | |- | ||
| + | |[[Image:0402-SarahCat.jpg|180px|link=Am I A Criminal?]] | ||
| + | |- | ||
| + | |height="12px"|<!-- spacer --> | ||
| + | |- | ||
| + | |[[Image:409-CeremonyAllOverAgain.jpg|180px|link=Bloodlines: Part 3]] | ||
| + | |- | ||
| + | |height="12px"|<!-- spacer --> | ||
| + | |- | ||
| + | |[[Image:NBR026-Duckies.jpg|180px|link=Nikki Tied Up]] | ||
| + | |} | ||
| + | <!-- ################################################################### | ||
| + | #################### RIGHT SCREENCAP COLUMN ENDS HERE ################## | ||
| + | #################################################################### --> | ||
| + | |- | ||
| + | |align="left" valign="bottom" style="width: 20px; border-left: 15px solid #1a4b97; border-bottom: 15px solid #1a4b97; padding: 0px;"|[[Image:Lgp lov bl corner.png|link=]] | ||
| + | |style="border-bottom: 15px solid #1a4b97;"| | ||
| + | |align="right" valign="bottom" style="width: 20px; border-bottom: 15px solid #1a4b97; padding: 0px;"|[[Image:Lgp lov br corner.png|link=]] | ||
| + | |colspan="2" style="border-bottom: 15px solid #1a4b97; background-color: #1a4b97;"| | ||
| + | |} | ||
| + | [[Category:lonelygirl15]] | ||
| + | __NOEDITSECTION__ | ||
| + | __NOTOC__ | ||